
Menus
Falcon CMS has a visual drag-and-drop menu builder for creating and managing navigation menus.
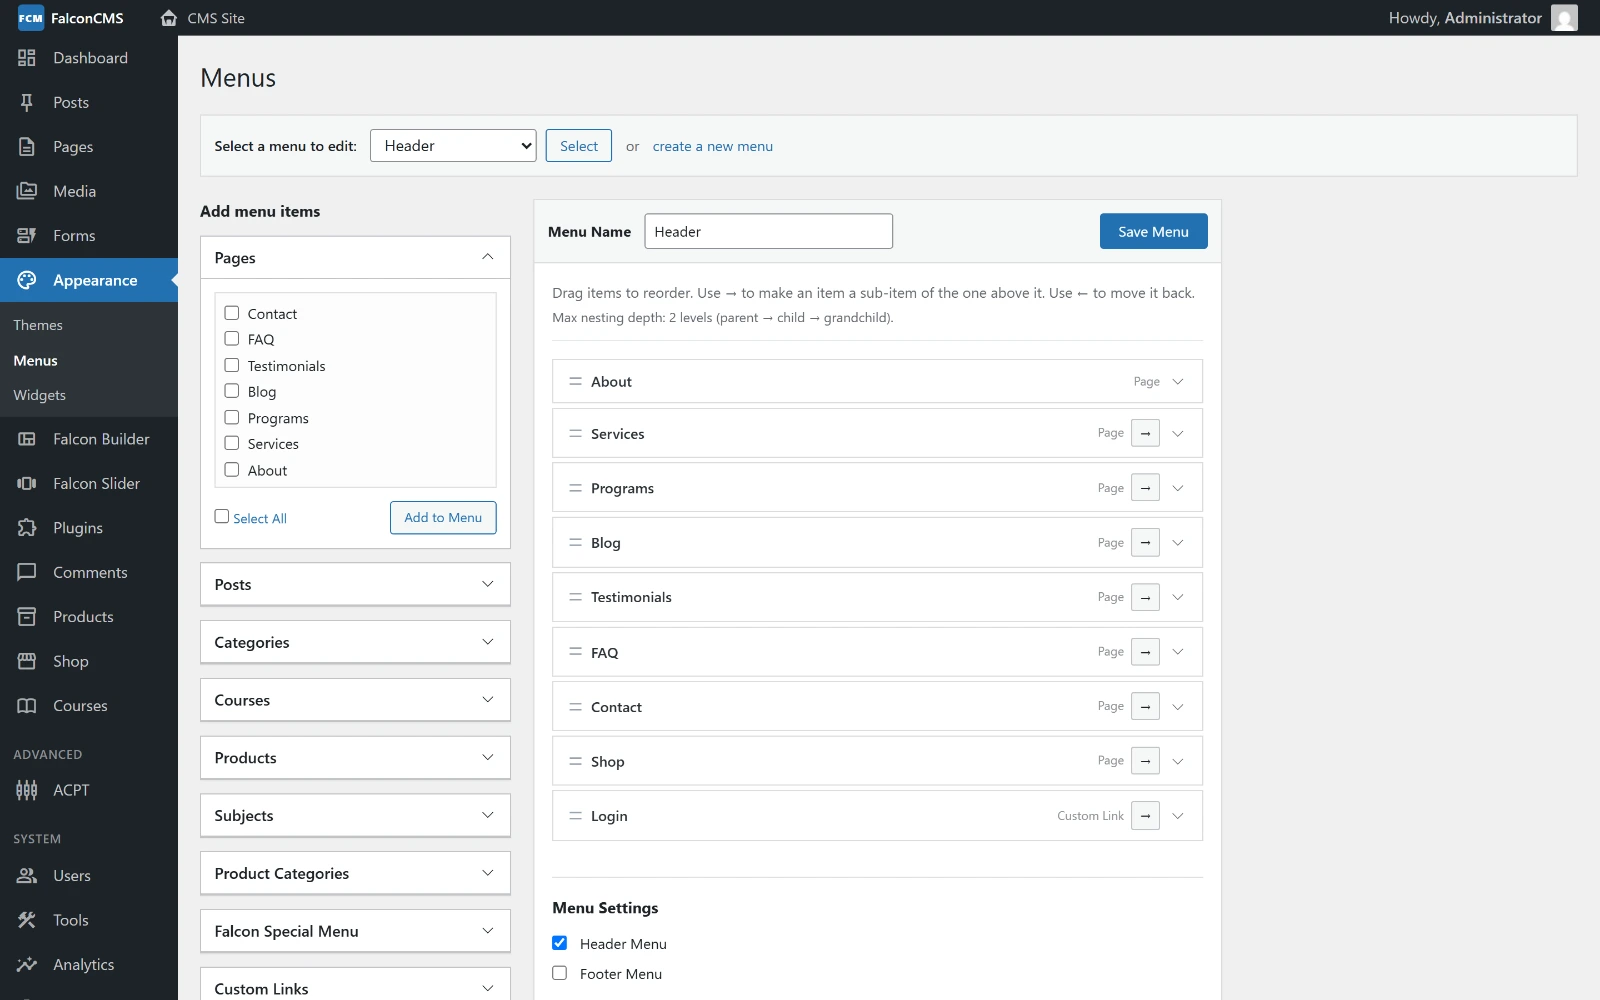
Add items from the panels on the left, then drag them into order — indent an item to nest it.
Creating a Menu
- Go to Admin → Appearance → Menus
- Click Create New Menu
- Give it a name (e.g., "Main Navigation") and a slug (e.g.,
main-nav) - Select a location: Header or Footer
- Save
Adding Menu Items
From the menu editor, add items from the panels on the left:
- Pages — Static pages
- Posts — Blog posts
- Products — Shop products
- Categories — Post categories and tags
- Product Categories — Product-specific categories and tags
- Custom URL — Any external or internal URL
Drag items to reorder. Drag items to the right (indent) to make them sub-items.
One-page (landing page) menus 2.7.0
For a landing page, add Custom URL items pointing at sections of the same page — give the section a CSS ID in the builder (say pricing) and set the menu item's URL to #pricing.
Those items behave as a set:
- Clicking one scrolls smoothly to its section and stops just below a sticky header, rather than jumping and hiding the heading underneath it.
- As the reader scrolls, the item whose section is at the top of the viewport is marked as current — including when they scroll there without clicking anything.
- A Home item pointing at the page itself is marked at the top of the page and steps aside once a section is reached, so only one item is ever marked.
Nothing needs enabling; it applies to the theme header and to the Layout builder's Menu element alike. Links to other pages are untouched.
A space after the #
# pricing is not a valid link and no browser will follow it. Save it as #pricing.
Reading Menus in Templates
// By location
$menu = get_falcon_menu('header');   // header menu
$menu = get_falcon_menu('footer');   // footer menu

// By slug
$menu = get_falcon_menu('main-nav');

// Render menu items
if ($menu && $menu->items) {
    foreach ($menu->items->whereNull('parent_id') as $item) {
        echo '<a href="' . $item->url . '">' . $item->title . '</a>';

        // Sub-items
        foreach ($item->children as $child) {
            echo '<a href="' . $child->url . '">' . $child->title . '</a>';
        }
    }
}
Builder-based Header & Footer
For maximum flexibility, use the Falcon Builder to create your header and footer visually:
- Go to Admin → Falcon Builder → Layout
- On the Global Layout card, click the Header or Footer slot
- Create a new section, or pick an existing one from the Existing Section tab
- Build your layout using the full Falcon Builder, and save
Render in your theme's layouts/app.blade.php:
<?php get_falcon_header(); ?>

<!-- page content -->

<?php get_falcon_footer(); ?>
The builder-based header/footer automatically applies sticky behavior and responsive visibility.
Mega Menus
Falcon CMS has a built-in visual Mega Menu Builder — no CSS required.
Enabling a Mega Menu
- In the menu editor, hover over any top-level item
- Click the Mega Menu toggle that appears
- Click Edit Mega Menu to open the builder
Mega Menu Builder
The mega menu panel opens a mini page-builder where you can:
- Add multiple columns (2, 3, or 4 column layouts)
- Place any builder element inside each column — headings, image, links, icon lists, etc.
- Set a panel background color and max width (defaults to site width)
- Each column has its own settings (width, padding)
How it renders
When a visitor hovers over the top-level item, the mega menu panel drops down — centered and constrained to your site's configured width. It is fully responsive and collapses to a standard mobile accordion on small screens.
TIP
If the mega menu panel appears misaligned, check Settings → Site Width — the panel uses this value to center itself relative to the page container.